How to Improve IP Reputation for Scalable, Cold Email Marketing
Learn how to improve IP reputation by monitoring your reputation, implementing email authentication, maintaining good list hygiene, and avoiding spam triggers.

Have you ever sent out many cold emails to have your hopes crushed as you read the dreaded “Your message was sent to Spam” notification? It can feel like a punch to the gut. And the worst part is that it could take weeks or even months to recover from the blow. That's why learning how to improve and fix email reputation is crucial. The higher your IP reputation, the better your chances of avoiding the spam folder and landing your emails where they matter: the inbox. This article will share actionable strategies for boosting your IP reputation so you can get back to scaling your email outreach, driving engagement, and generating high-quality leads without deliverability issues.
Inframail’s email infrastructure is designed to help businesses like yours consistently land in the inbox. By using our solution, you’ll not only improve your IP reputation but also make your email sends more reliable, enabling you to achieve your outreach goals faster.
Table of Contents

Email IP reputation measures how Internet Service Providers (ISPs) evaluate whether an email sender is legitimate. This metric determines whether the sender’s emails reach recipients’ inboxes or spam folders. When ISPs see a sender has a good IP reputation, they will likely deliver their emails to the inboxes. If the reputation is poor, the emails will either be discarded or sent to the spam folder. ISPs investigate email IP reputation to protect users from spam and malicious attacks. When they spot suspicious activity, such as phishing attacks or spoofing, they put the IP address on blacklists. Your server IP reputation directly impacts email deliverability, whether you send transactional emails or carefully planned email marketing campaigns.
What Factors Affect Email IP Reputation?
Multiple factors impact email IP reputation. Here are the most important ones:
Sending Volume
This one can be tricky. High sending volumes can positively impact your IP reputation. If the IP isn’t warmed up, high sending volume can raise red flags among anti-spam filters and reduce the reputation.
Open and Click Rates
ISPs also check your recipients’ engagement. If the open and click rates are low, your emails may be seen as spammy.
Spam Complaint Rates
Frequent spam complaints indicate to ISPs that your recipients aren’t interested in your emails.
Bounce Rates
Bounces happen when emails can’t be delivered to the address. A permanent failure is called a hard bounce, while a temporary failure is a soft bounce. High bounce rates indicate that your mailing list isn’t maintained regularly, making ISPs suspicious. Depending on these factors, your IP address will receive a reputation score between 0 and 100.
What is the Difference Between IP Reputation and Domain Reputation?
IP reputation and domain reputation comprise email sender reputation. The differences between them are primarily in the scope. To determine the IP reputation score, ISPs check the reliability of the sender’s IP address. To measure domain reputation, they check the history of the sender’s domain address.
A Digital Background Check
Think of ISPs as police. Whenever someone is suspected of a crime, they check where that person lives, who they are, and whether they have a criminal record. ‘Where’ is the IP address, ‘who’ is the domain, and ‘criminal record’ is your sending history.
ISPs look at domain and IP scores to maintain a good sending reputation.
IP Reputation | Domain Reputation | |
Definition | Perceived reliability of a specific IP address | Perceived reliability of a specific domain |
Factors | Type of content hosted, frequency of spam or malicious activity, length of time in use | Type of content hosted, frequency of spam or malicious activity, length of time in use |
Scope | Limited to a specific IP address | Can encompass multiple IP addresses associated with the domain |
Impact | Can affect email deliverability, website accessibility, and other online activities | Can affect email deliverability, website accessibility, and other online activities |
What is the Difference Between Shared and Dedicated IP Reputation?
IP addresses can be either shared or dedicated. A shared IP is an address that multiple users utilize simultaneously. This means that one sender's actions can impact another's email deliverability and reputation. Let’s say you and your neighbor use the same IP address. You use yours to reach your customers, but your neighbor sends out spam day in and day out. You can rest assured that ISPs will see you as a spammer, too. In real life, shared IPs can be used by hundreds or thousands of senders.
Impact on Email Reputation
A dedicated IP address is the IP address that one sender or organization exclusively uses. This means that you’re in complete control over your email reputation. To achieve that, it’s essential to warm up the IP of your email server—start sending with lower volumes and increase the numbers gradually. Both shared and dedicated IPs have pros and cons, but simply comparing the benefits and drawbacks isn’t enough to determine which one is better for IP reputation. That’s why we decided to include the use cases instead.
Use shared IP if:
You send less than 100,000 emails per month. Dedicated IPs must have high sending volumes to qualify for a good reputation quickly.
You send bulk emails inconsistently. Sudden spikes in sending volumes will alert ISPs if you’re using a dedicated IP. Such changes will be less noticeable if thousands of users use the sender IP.
You’re on a budget. If the above factors apply to you and you don’t have money to waste, opt for a reliable email service provider (ESP) and use a shared IP.
Use dedicated IP if:
You’re sending more than 100,000 emails per month. The sending volume will be enough to establish a good sender IP reputation quickly.
If you’re sending corporate emails, you may want to have your sending IP whitelisted. That won’t be an option with shared IPs.
You’re sending emails to an interested audience. Dedicated IPs are more vulnerable to spam complaints, unsubscribes, and low open and click rates. So your mailing list should be cleaned out and maintained frequently.
Related Reading
• Blacklist Removal
• IP Address Reputation
• Blacklisted Email

You can check your email IP reputation manually or with dedicated tools. In this section, we’ll concentrate on the first option and list ordinary IP checkers in the following section. But before we get to the actual checking, we have to find the IP of the sending mail server. We can search ‘what is my IP’ and rely on online tools. Even so, their results aren’t always 100% accurate.
Check Email Headers for IP & Authentication
A more reliable method is to check the email headers. Email a Gmail account and open it from a web browser. Find the three dots in the top right corner and choose ‘Show original’ from the menu. A window will pop up where you’ll see the technical details of the email, including authentication details. Find ‘SPF’ and you’ll see ‘Pass with IP 192.0.2.0’ (this is just an example – you’ll see a different IP address). That IP address is the one used for sending emails.
Find IP & Check Reputation
Alternatively, you can scroll down to find the same information in raw format. Look for spf=pass records, and you’ll see the IP. Once you know the IP address, you can check its reputation using multiple methods. The first option is to sign up for feedback loops. It’s a service that directs complaint data to the sender. If the complaint rates are exceptionally high, your IP reputation is likely poor.
Ask ESP or Recipients for Reputation
Another option is to ask your ESP to provide information on my reputation. This can be time-consuming unless they have ready-made reports. The same goes for asking your recipients whether they receive your emails. Some may not respond, while others may reply in a month. The response rate is likely low, providing insufficient information to conclude the IP reputation.
Monitor Deliverability or Use IP Checker
Finally, you can monitor your deliverability rates closely to determine if something’s up. If you choose this method, ensure you check different mailbox providers. Emails may be delivered to the Yahoo or Outlook inboxes but fail to reach the Gmail inbox. None of these results will yield comprehensive and accurate results. It’s way easier to use an online IP reputation checker.
4 Email IP Reputation Checking Tools
Hundreds of email IP reputation lookup tools exist on the internet, and we can’t possibly discuss all of them. So, we picked the four most respectable options. To determine your reputation score, they use metrics such as:
Sending volume
Complaint rates
Blacklisting
Bounce rates
Engagement rates
Google Postmaster Tools
Google Postmaster Tools is a go-to option for checking IP reputation. It shows the percentage of emails delivered to Gmail inboxes, those that landed in spam folders, or were rejected. Postmaster allows users to track IP reputation in real time by sending alerts when the reputation drops significantly. The tool is also useful for obtaining information about email authentication and encryption, recipients’ engagement metrics, or the content of emails.
Talos Intelligence by Cisco
Talos Intelligence by Cisco also provides an IP reputation checker. It uses data sources such as threat feeds, global honeypots, and Cisco telemetry to assign IPs or domains a reputation score. Talos also provides information about email volume, blocklists, content, and owner details.
Sender Score
SenderScore.org, by Return Path, checks IP reputation on a scale from 0 to 100. It’s an industry standard that uses data provided by ISPs and ESPs to determine your score. 0-70 means that your IP reputation is poor and your delivery rates will be compromised. 70-80 is fair, which is not bad, but you must improve. 80+ indicates a good IP reputation.
Barracuda
Barracuda Reputation System from Barracuda Network tracks the history of IP addresses. It keeps the records of spammers and legitimate senders. With its Reputation Lookup, you can quickly check how your IP is listed in its system.

Related Reading
• Google Blacklist Removal
• How to Get Off Email Blacklist
• Blacklist Removal Tool

Picking a trustworthy email service provider is essential to improving your IP reputation. A good ESP will have established relationships with ISPs and strict anti-spam policies. As a result, they can help you get back on track. They might even let you know if you’re sending emails that look suspicious before you get in trouble with ISPs.
Implement Email Authentication Protocols to Prove You’re Legit
Email authentication protocols like SPF, DKIM, and DMARC prove that the sender is legitimate. Implementing these protocols will minimize the risks of spoofing and phishing attacks. We recommend setting up PTR records as well. That way, you’ll pass the reverse DNS lookup successfully. With these measures, you’ll tell ISPs you’re not engaging in malicious activities.
Warm Up Your IP Address Before Sending Marketing Emails
If you use two separate email servers, you want to “warm up” your marketing email IP address. With IP warming, you send small volumes of email, which gradually increase over time. If you send a large volume of emails from the IP address on the first day, spam filters will recognize this, and your IP reputation will plummet again. Some best practices for IP warming include:
Establish feedback loops: Remove any email addresses that marked your messages as spam or individuals who requested to opt out.
Prioritize engaged users: To prevent emails from being marked as spam, send small batches of emails to users who are more likely to click through and not delete them.
Clean up your database: Remove inactive and lapsed recipients to increase the percentage of users clicking through.
Start with the best you have: To increase the click-through rate and build the IP reputation, start with a proven, high-performing campaign, such as coupons or discounts.
While IP warming is a great way to control IP reputation, it is not always necessary. If you’re using two different servers with shared IP addresses, warming is unnecessary. IP warm-up only applies if you’re using a dedicated IP address.
Use Double Opt-In to Keep Your List Clean
A double opt-in is particularly important if you send marketing emails and transactional notifications. It asks new subscribers to verify their subscriptions by clicking email confirmation links. This ensures that only engaged and interested recipients receive your emails. In other words, you’ll receive fewer spam complaints. While you’re at it, remember to create and grow your mailing list organically. We don’t recommend using illegitimate mailing lists, as the chances of ending up in spam traps are too high.
Remove Inactive Subscribers Regularly
More recipients don’t mean that you’ll get more sales. Your emails will just be marked as spam more frequently.
Monitor Your Sending Volume
Monitoring the sending volume is also a good idea, especially if using a dedicated IP address. Remember the IP warmup we mentioned earlier? Also, stick to a consistent schedule. You’ll make ISPs suspicious if you send a single email one day and flood thousands of recipients the next.
Keep an Eye on Bounce Rates
Finally, you should track your bounce rates closely. Minimize the emails you send to invalid email addresses. Examine the reasons behind hard and soft bounces and take action accordingly.
Separate Your Marketing and Business Transaction Email Servers
Marketing emails and business transaction emails serve different purposes. Your marketing department likely sends more emails than your workforce members. One way to increase your IP reputation is to separate these two email servers from one another. By using two separate servers, you increase the IP reputation of both of them. First, it reduces the total number of emails sent from either server. Second, it allows you to ensure that business transaction emails make it to the intended recipient’s inbox.
Check Servers for Malware Infections
Cybercriminals that infect email servers with malware can use them as “zombie” machines. In other words, they control the device and use it to send malicious spam messages without your knowledge. When spam filters pick up these emails, they attribute them back to your “zombie” server and assume you’re sending the infected emails. Often, malicious actors connect a series of zombie servers, creating a botnet. Then, they use the botnet to engage in additional malicious activities such as:
Credential leaks
Unauthorized access
Distributed Denial of Service (DDoS) attacks
If you monitor your servers for malware and remove it, your IP reputation can be boosted.
Review Reasons for Hosting a Public Proxy Server
Proxy servers sit between your users’ computers and the internet, acting as a gate through which data traffic travels. When users connect to a website, they send data through the proxy server. The data request is sent to the website, which returns a response that has to cross through the proxy server again. Proxy servers can enhance security when set up correctly. Public proxy servers can increase data security risks that lower your IP reputation. Often, malicious actors anonymize their proxies as part of their attack methodologies. If you’re using a public proxy server, IP reputation software mistakes your proxy for a malicious, anonymized one.
Set Public Proxy Server Policies
If you’re satisfied with the reason for using a public proxy server, you need to place controls around it to help improve your IP reputation. For example, as part of your public proxy server policy, you should deny access to web-based applications. Doing this reduces a malicious actor’s chances of stealing user ID and password information.
Avoid Public Proxies
Additionally, you want to ensure that your corporate email server doesn’t use a public proxy to protect your IP reputation. Ensuring that your email server uses a private proxy protects necessary email credentials and reduces the likelihood that cybercriminals can use it as part of a botnet. Furthermore, if you use a public proxy server, you want to filter out illegitimate or malicious IP addresses. With the right web traffic filtering tool, you can mitigate risk. Unfortunately, even with web filtering, cybercriminals can find a way around the denial policies by:
Using dynamic IP addresses
Using a fake IP address
Set Up a Web Application Firewall
A WAF is a firewall used by a web application server that reviews requests to filter out malicious web traffic. Many WAFs offer IP Reputation Filter policies that can be used at the network or application layer.
Some of the filters include:
Geographic location
Known risky IP addresses
Anonymous proxies
Monitor for Connections to Command-and-Control Servers
Cybercriminals use C&C servers to send commands to malware-infected systems and devices. When malicious actors use “zombie” servers, they usually send the information from their C&C servers.
Detect C&C Servers with Honeypots
One way to detect C&C servers is to set up a honeypot. Honeypots are a security tool that “act” like traditional targets. For example, you might set up a network with all the same rules and protections as your core network. When cybercriminals are in the learning or “reconnaissance” phase, they treat this honeypot network the same way they treat your core network. Using the honeypot, you can see how their attack works and look for similar activities on the core network. This lets you discover potentially compromised servers and increases your IP reputation.
Review All Subdomains
Your top-level domain is the primary web address for your company. When organizing your website, your subdomains are how you organize additional resources. For example:
Top-level domain: www.myamazingcompany.com
Subdomain: www.mail.myamazingcompany.com
Subdomain: www.store.myamazingcompany.com
Subdomains Help Separate IP Reputations
The subdomain then has its IP reputation. Often, the subdomains are hosted on different servers, and since each server is a device connected to the internet, each one has a different IP address. This offers two benefits. First, you can separate your marketing and business transaction email IP reputations. Second, you can view the IP address causing the IP reputation problem more clearly. Combining the two domains makes it harder to determine whether the IP reputation issue is caused by the marketing emails being tagged as spam or by another underlying cause.
Set Up an SSL/TLS Certificate
Secure Sockets Layer certificates are small data files that encrypt data shared from a server to another location, like another server or a browser. Transport Layer Security is a newer, more secure encryption protocol that protects data like an SSL certificate. SSL/TLS certificates improve security and offer a way to verify an IP address. The digital certificates certified the device's identity on the network. Whether you’re looking to increase the reputation of a public or private IP address, verifying the IP address is a way to prove that it’s not a malicious actor’s anonymized IP. This means that IP reputation services will be less likely to consider your IP address a threat.
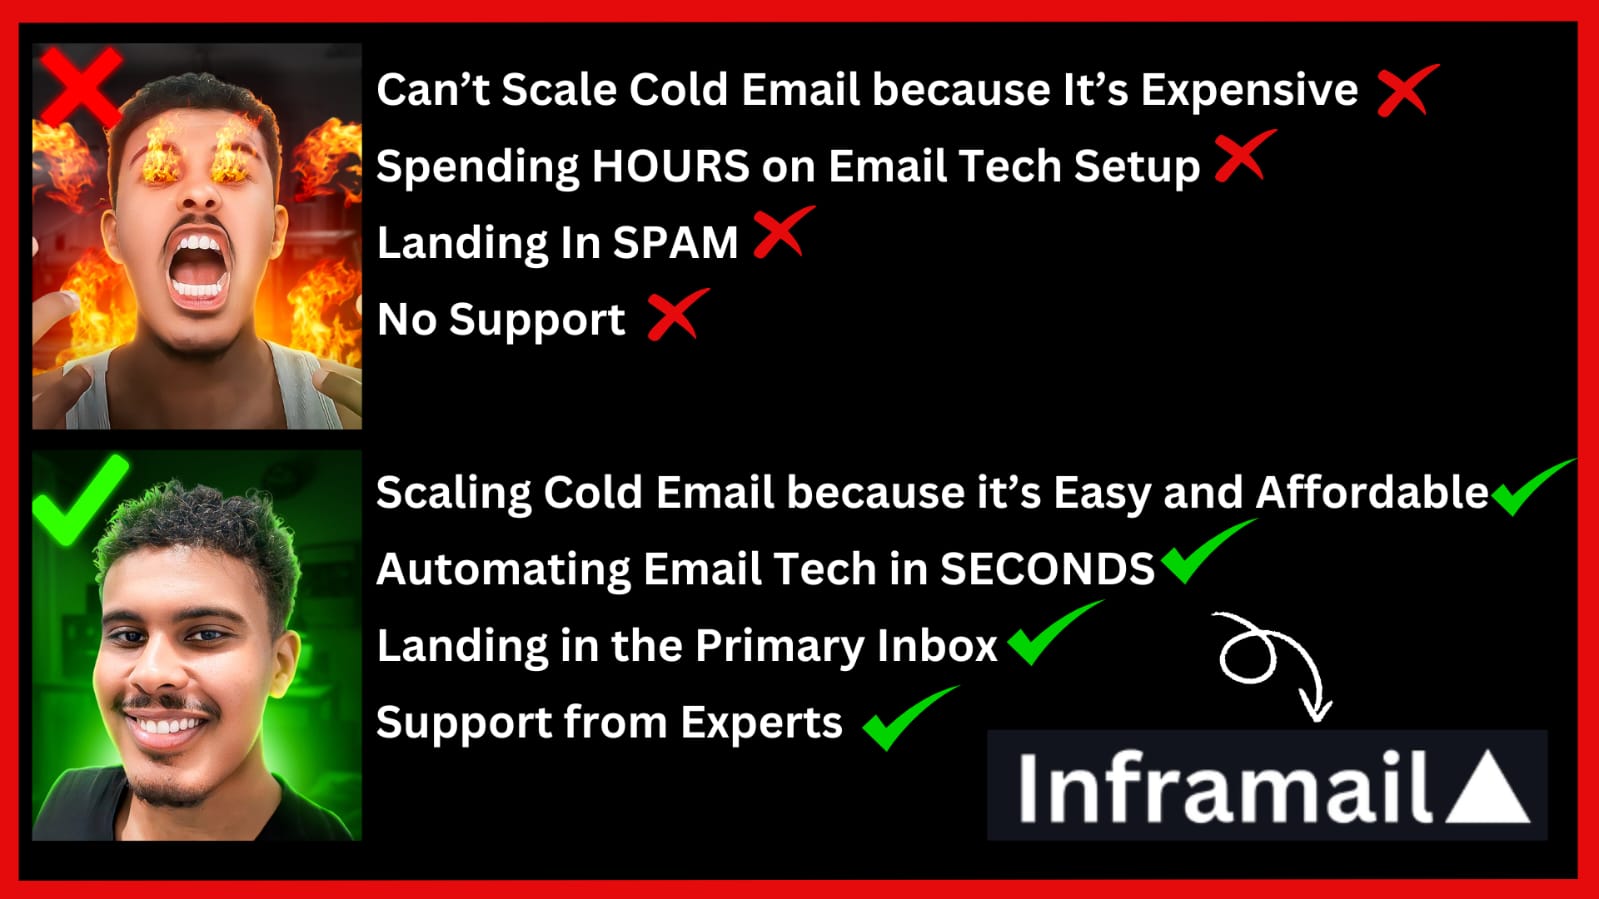
Inframail is a cold email tool that provides a smooth sending experience and high deliverability. We’re revolutionizing cold email infrastructure with unlimited inboxes at a flat rate. We provide Microsoft-backed deliverability, dedicated IP addresses, and automated technical setup to help agencies, recruiters, and SDRs scale their outreach efforts efficiently.
How Can Inframail Improve Email Deliverability?
Inframail can improve your email deliverability by providing an automated technical setup for SPF, DKIM, and DMARC. These protocols help verify your identity to mailbox providers. When you send an email, it gets checked against these protocols, and if you fail, your emails are much more likely to end up in the spam folder. With Inframail's automated setup, you don't have to worry about this technical configuration. We take care of it so you can focus on reaching more prospects. Inframail's 16-hour support also helps ensure you can resolve any issues quickly.
Related Reading
• Microsoft Blacklist
• Remove Domain from Blacklist
• Check if Email Is on Blacklist